19 Useful Woodworking Tools For Beginners, And Why You Need Them
Do you feel like the list of woodworking tools for beginners is never ending? It seems like a person could spend tens of thousands of dollars before they can even get started.
Well I can assure you, it does NOT have to be that expensive. There are some basic techniques you need to be equipped to handle. I’ve learned over the years how to do without some of the more expensive power tools, as I’m limited on space in my garage wood shop.
So below I’ve listed the 19 tools I believe a beginner woodworker would benefit the most from. These are well-rounded and mostly versatile woodworking tools. If I had to start over, with my shop and knowledge, this is the list I would begin with.
1 – Table Saw
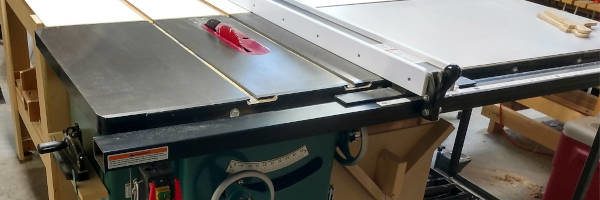
The table saw is by far the most useful and versatile tool in a wood shop. I’ve had a table saw since I was a beginner woodworker and by learning more about it, and using it on more projects, I was able to take my skills and capabilities to the next level.
Even if you start out with a less expensive table saw, you can still use it for many types of cuts and joinery techniques.
NOTE – If you are NOT ready for a table saw, that’s ok, you can still enjoy woodworking. You will want a good cross-cutting tool (see below), and you’ll need to spend a little more time planning your projects around the lumber you have available to you.
For example, if your local lumber stores sell standard dimensional 1×4, 1×6, and 1×8 boards, you’ll be using these for your projects. You won’t be ripping them down to a narrower width (without a table saw) so you’ll need to plan your projects to use the full width of these boards.
But again, cross cutting is a necessity, which is next…
2 – Cross Cutting Tool
I don’t want to limit this to a single tool, because you have a few options, and there’s no need to spend money when you don’t need to.
You’ll need to cross cut (cutting across the grain to make a board shorter) for 99% of your projects (if you’re into basic projects like furniture, small crafts, picture frames, etc).
Your cross cutting tool will also handle your miter cuts if/when you need to make them. Each choice listed below will handle basic crosscutting and miter cuts.
Compound Miter Saw – this is usually the go-to beginner woodworking tool for most people when they’re starting out. It’s not too expensive, and does a good job. It’s what I started with and even though I don’t use it as much anymore, it’s still a very handy power tool.

Miter Box – This is the easiest and most accurate “manual” version of cross cutting. It’s a very inexpensive way to handle your cross cuts and miter cuts. It’s definitely a step up from cross cutting freehanded, which is really an art that takes a long time to master and to do accurately.
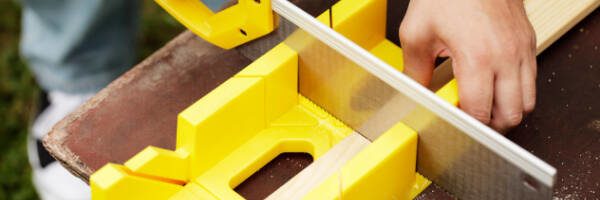
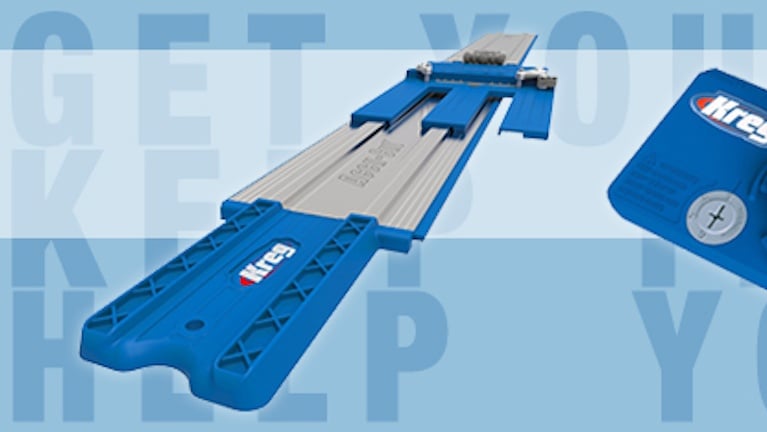
Table Saw – If you choose to get a table saw, you can skip the miter saw altogether. The table saw with it’s included miter gauge will handle basic cross cuts and miter cuts. Plus, you can always build a table saw sled to more accurately handle all your cross cutting needs.
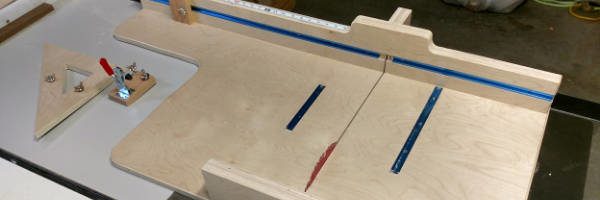
Click here to learn how to build a basic crosscut sled
Click here if you want a dedicated miter sled
Click here to learn more about the advanced sled in the picture
3 – Curve Cutting Tool
For many projects, you’ll be able to greatly enhance the style and design by adding a simple decorative curve. Some curve cutting tools even handle fretwork, which is when you cut a section from within the boundaries of the board (without cutting in from the edge). This is useful in decorative work, but also in creating functional projects like woodworking jigs.
Another benefit of these tools is that you’ll be able to eventually take on more difficult cuts with ease. For example, cleaning up a dovetail joint can be done quickly and accurately with a scroll saw or even a coping saw.
Here are your main choices for curve cutting tools:
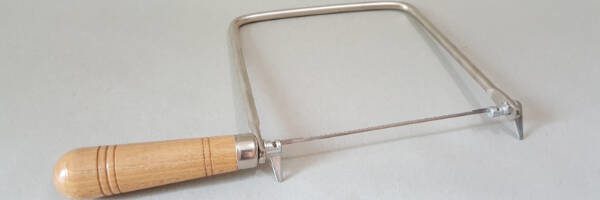
Coping Saw – this is a hand saw with a deep frame and a narrow blade. It can handle fine-detail work, curves, dovetails, fretwork, and coping trim molding.
Jig Saw – this handheld power tool makes quick work of cutting curves, and even does a decent job with straight cuts. Various types of blades work for different types of cuts.

Scroll Saw – this stationary power tool oscillates up and down, with the cutting action going downward. It’s ability to make precision cuts leaving a smooth finish make it ideal for fine detail and fret work.
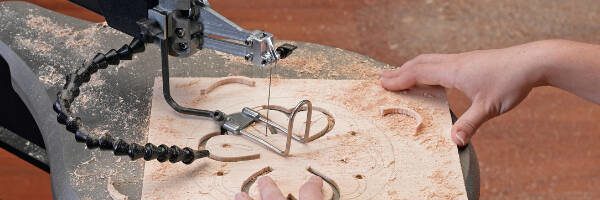
It also works great for any basic curve cut. It’s limited by the depth front to back, while side to side it has no limitation.
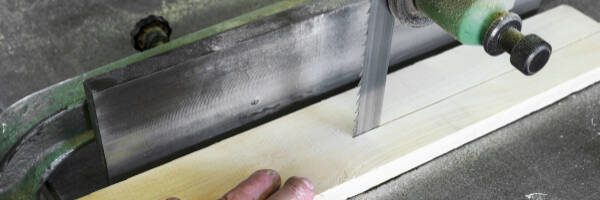
Band Saw – this common woodworking tool is great for basic curves, trimming down rough cut wood, and re-sawing. However, it’s the one curve cutting tool that does not handle fretwork, as the blade can not be inserted into a hole in the board. It’s limited by the depth on one side, with no front to back limitations.
If you’re one the fence about which tool to get first, read Scroll Saw vs Band Saw.
4 – Hand Saws
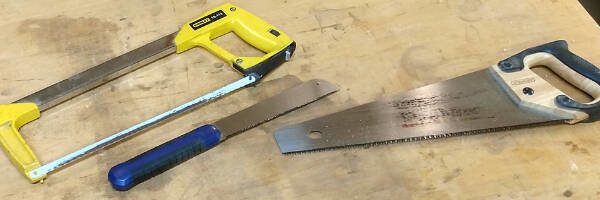
A regular finishing hand saw, like my Stanley Fat Max, will come in handy for some projects. A decent pull saw also does wonders. It cuts on the pulling action, making it more accurate and versatile for detail work.
Another handy choice (but not required) is a hack saw to cut metal. I use this quite a bit when building table saw sleds and jigs that require aluminum hardware, like T-tracks or threaded rod.
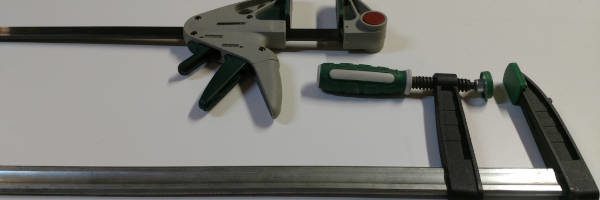
5 – Clamps
Learning how to do a glue up is part of woodworking. You can’t attach everything with screws and hardware (even though some of your initial projects may only require screws).
Clamps are needed for your glue ups, but also in some instances when doing chisel or planing work, when sanding, or when lining up and securing a shelf to a side table.
Here’s the main clamps I suggest starting out with:
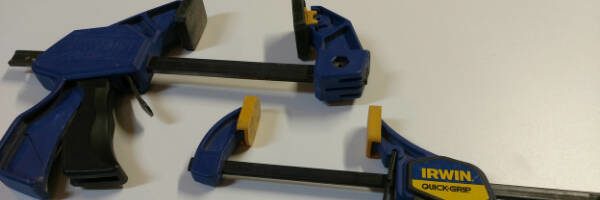
Bar Clamps – Start with with at least [2] of the 4ft bar clamps, and [2] of the 2ft bar clamps. This is usually enough for any project. Even though I do have more than that, I don’t often have more being in use at one time.
Quick Clamps – these are smaller, quick-set and quick-release clamps. I get the Irwin brand, they are fairly cheap and work great. I have 8 or so of these, and there are times I wish I had more. Get at least 4 of these clamps starting out, you’ll use them all around your shop, and for small project glue ups.
Hand Screw Clamps – these are the bulky wooden clamps with 2 threaded handles. They are unique in that they are squared off, meaning you can clamp the clamp down to your workbench, and essentially create vertical support like a vise, anywhere, anytime you need it.
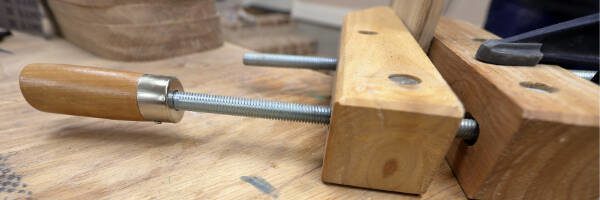
I’ve got 2 of these clamps and that’s always been enough. I would suggest getting at least 1 starting out.
6 – Block Plane

This small hand plane works great for cleaning up edges, flattening small pieces, adding a chamfer to a corner, cleaning up dovetail joinery, and more.
The more you learn, the more important this woodworking tool for beginners becomes.
Yes, one day you may decide to take on dovetail joinery. If you’d like to know more, I suggest reading the following article:
Introduction to Dovetail Joinery
7 – Set Of Woodworking Chisels
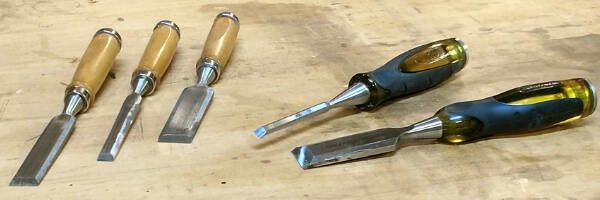
Basic chisels are helpful for any woodworker (unless you’re specialized like a wood turner or scroll sawyer).
I started out with a 1-1/4” Stanley fat max chisel I got from a hardware store. I learned how to sharpen it, kept it fairly sharp, and ended up using it all the time throughout learning woodworking.
If anything, it will help keep glue squeeze out cleaned up off your workbench.
I also suggest getting a narrow ¼” chisel in case you have a need for some detail clean up work.
If you plan on getting into learning some serious joinery soon, like dovetails and mortising, then a full set of chisels is a good idea. You don’t have to have the expensive set either. My set was less than $30 and they’ve worked out fine.
With that said, if you’re going to have a serious focus on mastering joinery by hand, you may want to spend more on your chisels. Get the kind that can be hammered on. Cheaper sets do not have steel extending through the handle to support hammering.
8 – Sharpening Kit
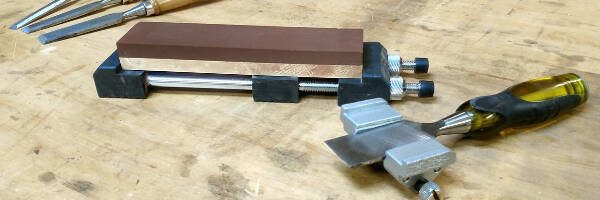
If you have planing irons and woodworking chisels, then you need to add a sharpening kit to your list of woodworking tools for beginners.
Nothing is as useless or counterproductive than a plane or a chisel with a dull blade.
You can get a decent water stone for cheap, or a more expensive set of diamond plate sharpening stones if you’d prefer.
I have a full article on sharpening chisels, where I also layout some basic options for building your sharpening kit:
How To Sharpen Your Chisels
9 – Random orbital power sander

A power sander is a popular and useful woodworking tool for beginners and seasoned pros alike. While opinions may vary on what kind of power sander you should use, I personally get great results using the random orbital sander.
This tool uses hook and loop sanding pads of various grits, it rotates in a circle, and it oscillates side to side so the circle is uneven, thus ‘Random’. That way it reduces the chance of leaving circle marks everywhere it touches.
The trick with a good random orbital sander is to use the right grit for the job, and do not apply too much pressure. It makes sanding very easy (on flat surfaces where the tool has room to move around) and works faster than a basic palm sander.
Of course, you could always do your sanding by hand. That works good too, and it’s good exercise. But sometimes you don’t feel like exercising. So get you a power sander and save yourself some elbow grease.
How To Sand Like A Pro
10 – Squares
Good woodworking squares are essential tools for beginners. It’s kind of like the cook and his measuring cups. Yeah, maybe he can cook without it, but if he wants precision and consistency, he gets his measuring cups out. It’s the right tool for the job.
In woodworking, that’s where squares come in. Think about it. 90% of a woodworking project (in most cases) is done at 90 degree angles. Seriously, 90 degree angles are all over your projects!
Each board has 6 sides, and each side is connected to 4 other sides. The angle in all 4 directions is 90 degrees (unless it’s a miter of course!).
And then there’s joinery. Almost every joint you ever do in woodworking will need to be at 90 degrees to its mating board. In a sense, this is even true with miter joints. I mean, two 45 degree miters do create a 90 degree angle after all…
So with all these 90 degrees goin on, it’s a good idea to invest in a few good, accurate woodworking squares. I suggest the 3 following:
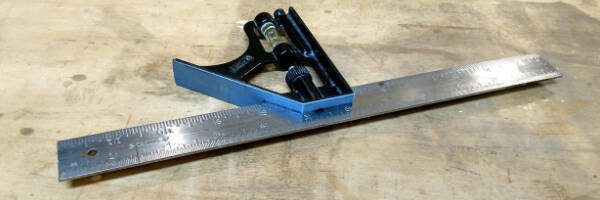
Combination Square – This is an all around handy square to have, as it can adjust to different depths making it helpful when marking and transferring marks and lengths.
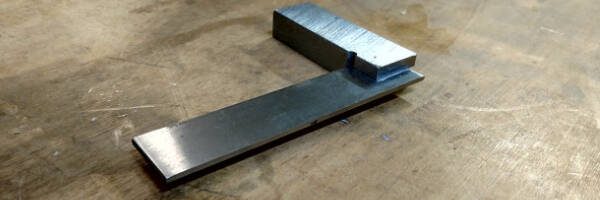
3” Machinest Square – this little guy is perfect for tuning your power tools, as well as checking square on a simple crosscut or rip cut.
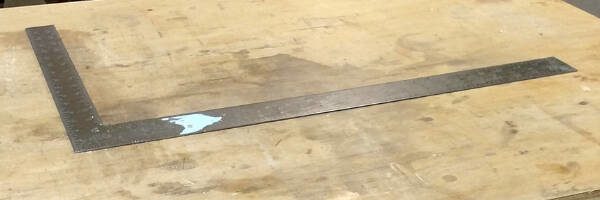
Framing Square – this is great for doing glue ups when you need to make sure 2 larger pieces are joined at 90 degrees before the glue sets. It’s also helpful in making 90 degree marks across larger pieces.
5 Tips On Improving Your Woodworking Accuracy
11 – Metal rulers

When measuring and marking, you need some good woodworking rulers. Basically, metal rulers that have indented graduations for marks is perfect for the job.
That way, you can line up your marking knife precisely at the right measurement, and make the mark on the board.
While I do have 36” aluminum ruler and a 6ft heavy steel ruler, I find my basic 18” and 6” steel rulers the most convenient and most used. These sizes are just handy and typically more than enough for marking and measuring.
12 – Tape measure

This may not be the ‘best’ woodworking tool for beginners, but it’s one of my most used measuring tools for a lot of projects.
It’s not made for precision, because the hook at the end slides back and forth, and the lines are not indented, nor are they thin (in most cases).
It’s made for construction, not for precision. But that doesn’t mean it’s not useful to woodworkers for several different reasons.
You’ll find that many measurements and cuts you make do not require precision. This is because you’ll make cuts to get a board close to its final dimensions, but it won’t be the final cut. So there are times when “close enough” is actually ok.
So here’s when the tape measure is handy. When you don’t need precision, but you need convenience. The tape measure works equally well on short and longer measurements.
Plus, it’s easily fastened to your belt so you can always have it on your side. A metal ruler will be out of reach when you need it, 99.9% of the time (in my experience).
13 – Marking knife

You can and you will use pencils as a beginner woodworker. But sometimes you need precision marks at a very specific, precise length.
And yes, that’s because sometimes you will need very specific sized boards.
So a marking knife leaves a small scratch in the wood fibers, instead of a thick graphite line. Plus, the marking knife (as mentioned above) can be lined up within the graduations of a good woodworking ruler.
So get you a basic marking knife, it does not need to be expensive. I spent less than $15 on mine, and not only has it lasted and worked great, but I still haven’t sharpened it from the factory.
It’s a simple marking tool that reminds me of the energizer bunny. Remember that? It keeps going and going and going…
14 – Drill

This should be a no-brainer, but some people see a power drill as a job site construction or handy-man diy projects type of tool.
But in woodworking, you will be drilling holes, and you will be using screws.
So get a couple cordless drills to take care of all your drilling needs. This will include not only setting screws, but also for countersinking, and for making clearance and pilot holes.
In case you didn’t know the difference, a clearance hole clears the threads and lets the bolt or screw pass through freely. But it’s still small enough to catch the head of the screw or bolt. A pilot hole is smaller and allows the screw to fit, while still catching most or all of the screw’s threads.
15 – Sanding Block

Sometimes, you cannot get a power sander over the entire surface. Or maybe you just need to do some quick sanding and you’re still feeling energetic from that last cup of coffee.
So yes, there will be times you will do some serious manual sanding, and a sanding block should almost ALWAYS be a part of that process.
Using sand paper in your hand is a surefire way to leave an uneven sanded finish, and possibly grooves from the uneven pressure your hand applies.
A good woodworking tool for beginners is a sanding block that has a velcro face. You’ll have to buy proprietary sanding pads for it, but it’s so much faster than other types of sanding blocks.
However, that’s not necessarily required. You can get by with basic sheets of sandpaper and universal sanding blocks. These take a bit more setup but they do the trick, and getting full sheets of regular sandpaper will save you money.
16 – Standard Shop Tools

When you have a woodworking shop, and it’s got woodworking tools, you need basic hand tools to maintain and tune these power tools.
That would be your box wrenches, sockets, ratchets, screwdrivers, allen wrenches, pliers, and a crescent wrench.
These also come in handy for DIY repair work around the house.
17 – Center Punch

This is used in woodworking for making a small hole to help line up a drill bit when drilling holes. If you only use a pencil to mark your hole location, it’s very easy for the bit to slide to one side before it starts to drill into the wood.
When using your center punch on softwood like pine, you can just push it in to make the indentation. When using it on hardwood, you’re better off tapping it with your mallet to make the indentation.
18 – Rubber mallet

As mentioned above, this is used for making an indentation in wood when used with a center punch.
But also, when doing your joinery, you’ll find that at times you need to provide a little “finesse” to one of the boards in the joint to make things line up. The LAST thing you want to do in this case is hit the wood directly with a metal hammer, so a rubber mallet is a much safer option.
But on that subject, when joining soft woods together, you’ll want to hold a scrap block of wood in place against the workpiece that’s about to take a beating. That will further protect the board from getting marred up in the process.
19 – Tuning Tools
And finally, get you a few high-tech woodworking tools for beginners. These are for all woodworkers actually, as they’re helpful for the beginner, and the fine woodworker, for tuning power tools, getting projects level, and improving accuracy…
Dial Indicator – this is helpful when aligning your table saws fence and it’s blade. Aligning these components are important for making clean, consistent cuts. So take the time to do it right, and use the dial indicator to help. (See the link below for more)

Digital Caliper – I haven’t found a ton of uses for this in furniture projects, but when you’re making a crosscut sled, there’s a process called the ‘5-cut method’ that allows you to produce a perfect 90 degree fence for the sled.

For that alone, I believe this tool is worth the small investment. And there will be other uses for it the more you develop your collection of shop jigs and sleds.
Digital Level – this tool is incredibly helpful in many different applications. It’s not only good for checking level, but also for finding specific angles of your project, table saw blade, miter sled fence, and more. Read more about it in the link below.

How to Tune Your Table Saw Fence
How to Align Your Table Saw Blade
6 Reasons To Get This Digital Level
More Information On Woodworking Tools For Beginners
14 Essential Woodworking Hand Tools
My Complete List of Woodworking Tools, Jigs, Benches, Etc…
9 Shop Projects To Improve Your Woodworking
Are you considering getting into pocket hole joinery? Read This.
Are you ready to get a table saw, or need help figuring yours out? Read This.
Need ideas on laying out a small wood shop? Here’s my garage wood shop layout… Read This.
If you found this article helpful, please share it on facebook or save it on pinterest!