How to Replace Progressing Cavity Pump Parts
Progressing cavity pumps are widely used in various industries due to their ability to handle viscous fluids and maintain a steady flow. Over time, these pumps may require maintenance or replacement of certain parts to ensure optimal performance. This article will guide you through the process of replacing progressing cavity pump parts, highlighting the necessary steps and components involved.
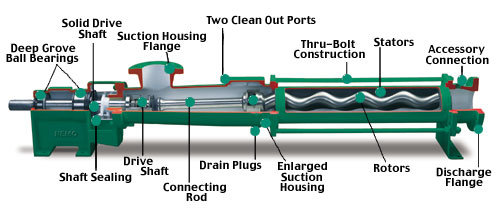
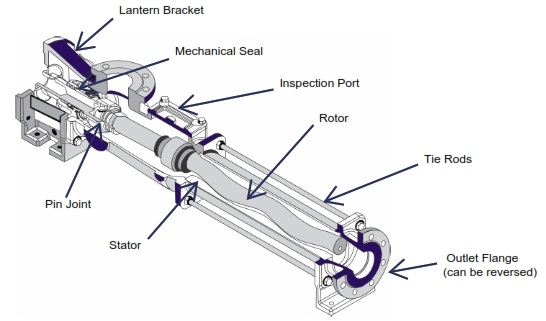
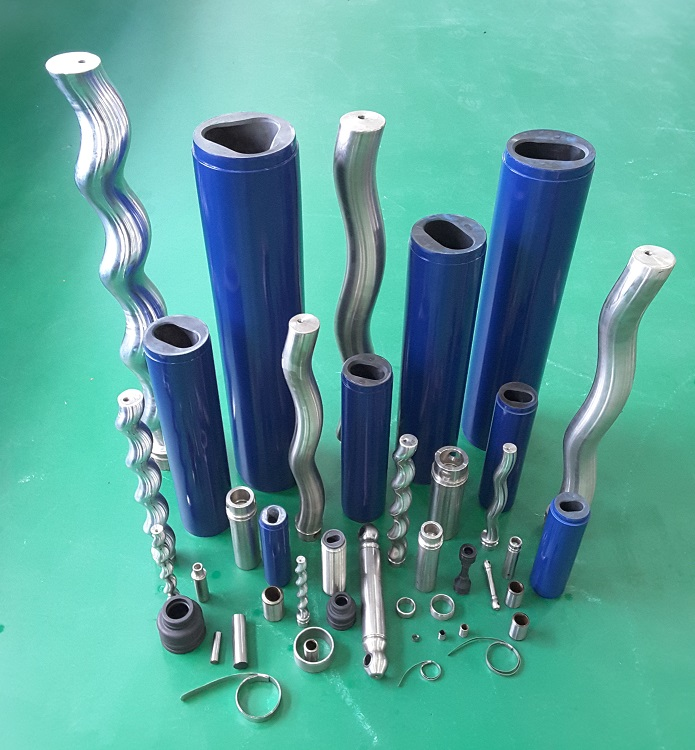
Understanding the Components
Before diving into the replacement process, it’s essential to familiarize yourself with the key components of a progressing cavity pump. The primary parts include:
- Stator: The stationary part that surrounds the rotor, providing a cavity for fluid movement.
- Rotor: The rotating element that transfers energy to the fluid.
- Suction and Discharge Flanges: The inlet and outlet connections for fluid flow.
- Drive Shaft: Connects the rotor to the motor, enabling rotation.
- Bearing Housing: Supports the rotor and allows for smooth operation.
When to Replace Parts
Certain signs indicate that replacement parts may be necessary:
- Decreased flow rate
- Increased energy consumption
- Unusual noises during operation
- Visible wear or damage on components
Step-by-Step Replacement Process
Replacing parts in a progressing cavity pump can be straightforward if you follow these steps:
Step 1: Safety First
Before beginning any maintenance, ensure that the pump is turned off and disconnected from power. Wear appropriate personal protective equipment to safeguard against potential hazards.
Step 2: Remove the Pump
Carefully disconnect the pump from its piping and electrical connections. Use appropriate tools to unbolt the flanges and gently lift the pump from its mounting.
Step 3: Disassemble the Pump
Once the pump is removed, disassemble it by carefully taking apart the stator, rotor, and other components. Take note of how everything fits together, as this will aid in reassembly.
Step 4: Inspect Components
Examine each part for signs of wear and damage. Look for cracks, wear on the rotor or stator, and any signs of corrosion. This inspection will help you determine which parts need replacing.
Step 5: Replace Parts
Identify the replacement parts required. Commonly replaced components include:
- Stator
- Rotor
- Bearings
- Seals
Purchase high-quality replacement parts that match the specifications of your pump model. Install the new parts carefully, ensuring they fit securely and correctly.
Step 6: Reassemble the Pump
Once the new parts are in place, reassemble the pump in the reverse order of disassembly. Ensure all bolts and connections are tightened properly to prevent leaks during operation.
Step 7: Reinstall and Test
After reassembly, reinstall the pump in its original position. Reconnect the piping and electrical connections, ensuring everything is secure. Turn on the pump and monitor its operation to confirm that it is functioning correctly.
Conclusion
Replacing parts in a progressing cavity pump is a crucial maintenance task that can extend the life of the equipment and ensure efficient operation. By following these steps and paying attention to the signs of wear, you can effectively manage the upkeep of your pump, minimizing downtime and maximizing productivity. Always remember to prioritize safety and consult the manufacturer’s guidelines for specific instructions related to your pump model.