The Jointer – 6 Reasons A Woodworker Should Consider Getting One

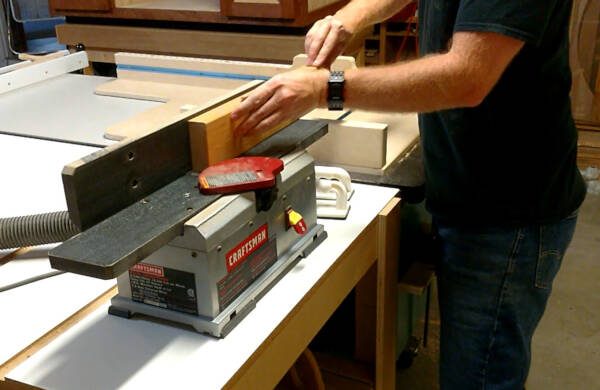
So you’re wondering if investing in a jointer is really worth it. Well, as a self-taught woodworker who has a basic 4” bench top jointer, I can tell you it definitely has its place in a wood shop.
It’s not required, because you can build furniture with lumber that has been jointed and planed, right from the lumber yard.
But when you start building more ‘fine-woodworking’ pieces, or if you get your hands on some great rough-cut lumber that needs a little milling before it can be used, then a jointer will definitely come in handy.
Below I’m going to share with you 6 reasons a jointer may be a great fit for your shop.
1 – The Jointer Can Remove Crook and Bow
Once you’ve got your project boards cut down to their rough length, which may be an inch wider and 4 inches longer than your final dimensions in some cases, it’s time to square it up.
If the board is crooked or bowed, you can use your jointer to flatten it out.
Running the crooked board along its edge a few times will remove the crook. And running the board along its face a few times should remove the bow.
2 – Use Your Jointer To Square Up Your Boards
Once you’ve created a flat edge, a flat face, and a 90 degree corner, you are just a few steps away from creating a straight and true piece of wood.
The first step in properly squaring and truing a board is creating one perfectly square corner by flattening 2 adjacent sides.
The jointer is by far the best tool to accomplish the initial square corner.
By jointing one face of the board until it’s flat, you can then run that face along the jointer fence. The cutters will then make the edge of the board a perfect 90 degrees to that face (assuming your fence is set right).
From there, you can move on to the rest of the squaring process, which I cover in detail here.
But for a quick overview of that process, here are basically the steps involved:
One objective is to make the other face parallel to the jointed face.
The proper way to do this is to run it through a planer, with the jointed face down.
Do this until you’ve achieved the final thickness you want for your piece, and both faces will become parallel in the process.
The other objective for squaring up your boards is to make the un-jointed edge parallel to the jointed edge.
To do this, you’ll want to using your table saw to cut the board to its final width, running the jointed edge along the rip fence.
If you do not yet have a jointer and need to square up a board, there’s another method using only a table saw: Square Up A Board With A Table Saw.
3 – Create Thicker Boards For Building Legs
When you laminate 2 boards together, you glue them up face to face, creating thicker stock.
This technique has many purposes, one of which is to create legs that need to be thicker than the stock you currently have.
For example, a common leg size for small and medium sized tables is 1-1/2” square. You can simply laminate two 3/4” boards together to create the thicker stock, from which you can then cut the 1-1/2” square leg.
But after a glue up when laminating, chances are slim to none that the edges ended up perfectly in line.
So running one edge through a jointer will not only square up the thicker stock, it will also flatten the edge so it appears it’s now one board (assuming the grain matches).
Now you can run that jointed edge along your table saw’s rip fence to rip it down to final dimensions.
4 – The Jointer Helps Create Flatter Panel Glue Ups
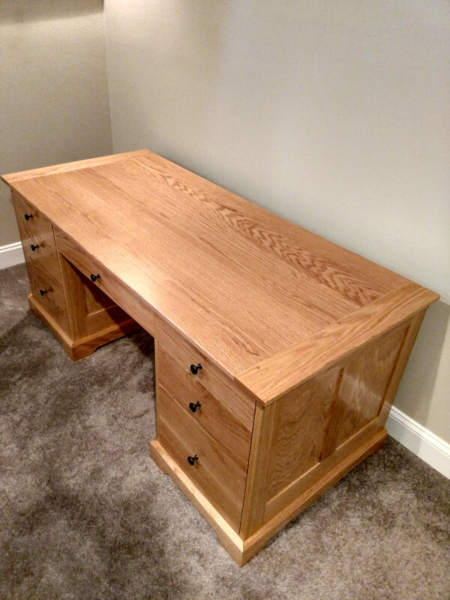
Gluing boards edge to edge is how you create what’s called a panel. The most common reason for this is building tops for things like tables, desks, and hutches.
For truly flat and level panels, you’ll want to use a jointer along the edges to make sure each piece in the panel is nice and square.
If you skip this step, you have a chance of creating a panel that’s wavy, bowed, or both.
Gluing jointed edges together is only part of the process in building a truly flat panel. For more on this subject, check out 12 Steps To Building Flatter Panels.
5 – Removes Surface Damage And Stains From The Lumber Yard
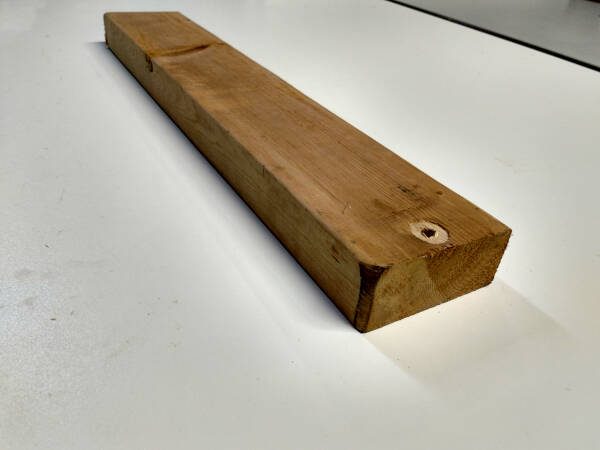
Sometimes the lumber yard can leave a piece of wood looking pretty dingy.
This is especially true if you’re working with standard dimensional lumber from the home stores, like pine or spf (spruce/pine/fur) 2x4s and 2x6s, which will also have rounded over corners, which the jointing will also eliminate.
So your initial milling of the board using a jointer will remove the surface damage and any ink or stains the board may have.
It’s kind of like doing some initial sanding, but with the jointer you get the added benefit of squaring up the board in the process. Sanding alone might make the board look better, but it will definitely not square it up.
6 – Takes The Board From Rough-Cut To ‘Ready For Final Sanding’
If you’re anything like me, you probably do not enjoy sanding all that much.
So that’s where using a jointer can eliminate some of the initial sanding you would otherwise need to do on a rough cut board.
As long as you’re using sharp blades in your jointer, a freshly jointed surface will be ready for glue up, no heavy sanding required.
In fact, after jointing the faces of the board, you may not need to do any final sanding at all. Though that really just needs to be a judgment call on your part. But jointing definitely helps to at least greatly reduce the amount of sanding required.
So be sure to keep those jointer knives sharp.
A Few Jointer Tips
- Don’t be too quick to make adjustments to your jointer alignment. It should be level and accurate from the factory, and making adjustments prematurely (before being absolutely certain they are needed), can cause more harm than good.
- When shopping around, you’ll find there are standard cutter heads that use HSS knives, and there are spiral and helical cutter heads. These 2nd two types are more expensive, but will leave a superior finish on the wood.
- A bench top jointer typically comes in 4 or 6 inches (width of board it supports). These work fine for what they are, just be prepared that they’re not designed to accurately joint full length boards. It’s best to rough-cut your stock down close to its final dimensions, then take the board through the squaring process.
- A stationary, full sized jointer is better suited to handle large, full length boards. These are most common in 6″ and 8″ widths. If you’re getting one of these, think about the normal width you buy stock in. If you typically get boards up to 8″ wide, you may regret getting a 6″ jointer, because you’ll always have to rip it down and waste material before you can joint it flat.
Related
12 Tips For A Flatter Panel Glue Up
How To Square Up Rough Cut Lumber
How To Sand Wood Like A Pro
Learn More About Small-Shop Woodworking