How To Build A Silverware Drawer Organizer – The Power Tool Website
Are you tired of over-crowded silverware slots? Are your forks and spoons overflowing your k-mart-special plastic fork divider? Keep reading to learn how to build a silverware drawer organizer that fits tight and gives you more space.

TOOLS AND MATERIALS NEEDED:
- Table saw
- Curve-cutting saw (jig saw, band saw, etc…)
- Sandpaper
- 1/4″ plywood
Ideally, the plywood you use for this should be a high quality hardwood plywood, like birch or oak.
I’m using engineered oak plywood, which actually has a single oak ply on each surface, and an MDF core. It’s just what I had laying around from a previous project.
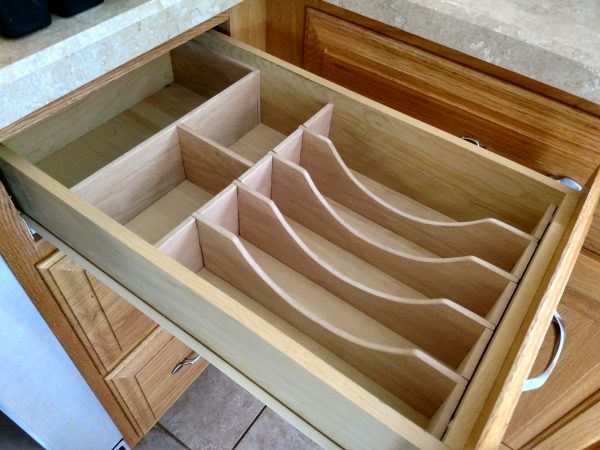
Here’s the organizer once it’s complete:
Big box home stores usually have partial sheets of plywood. For example, at Menards you should find some 4′ x 2′ sheets of 1/4″ hardwood variations. One of these is more than enough.
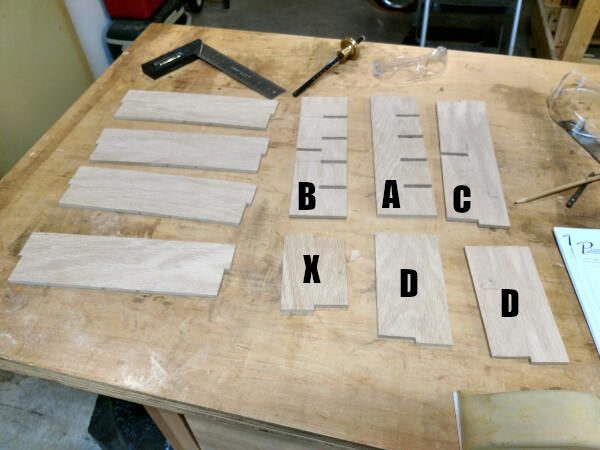
First, I want you to understand the plans I sketched up. It can be easily customized to fit most drawers.
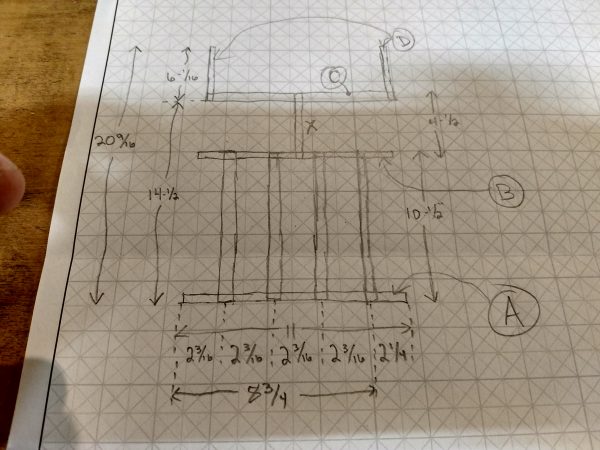
For each piece that overlaps in the sketch, one piece will be notched at the top of the piece, the mating will be notched at the bottom.
The inside dimensions of my drawer are 20-9/16″ x 11″. The depth is 3-3/4″, so I cut all the pieces 3″ wide.
For the actual silverware slots, 10-1/2″ is pretty standard. From that, you can determine the dimensions of the back sections of the silverware drawer organizer (D and X).
For my drawer, I just sized it for baby silverware behind the main section, and larger random storage at the back.
But don’t cut piece X to length just yet, that comes last. That’s the piece that will be cut to make sure everything fits tight from front to back.
For the space between the dividers, which determines where slots will be cut on A and B, you’ll want to take the width of the drawer and divide it by 5 (or however many slots you want to make).
For my drawer, that came out to an oddball fraction (2-1/5″). So I made one slot slightly bigger than the others to make them all simple fractions, as you can see on the plans.
With the divider width figured out, you can mark the center of each on pieces A and B.
You’ll also need to mark the board’s center line across each mark:
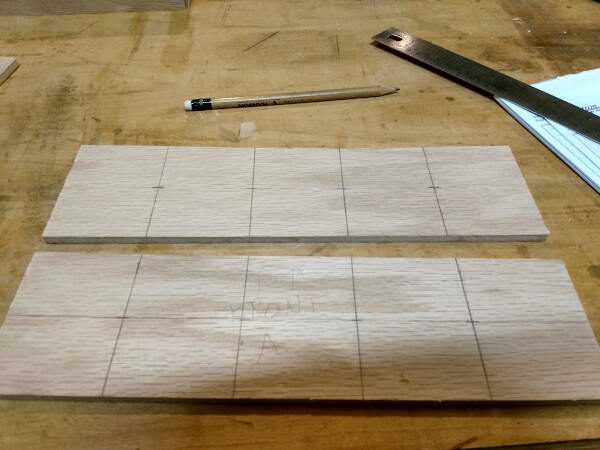
From here you can mark slots from the center to the edge, centered at each vertical line, the same width as the plywood (1/4″).
Also mark out the notches on the 4 dividers, at each end. These will be 1/4″, up to half way across the width:
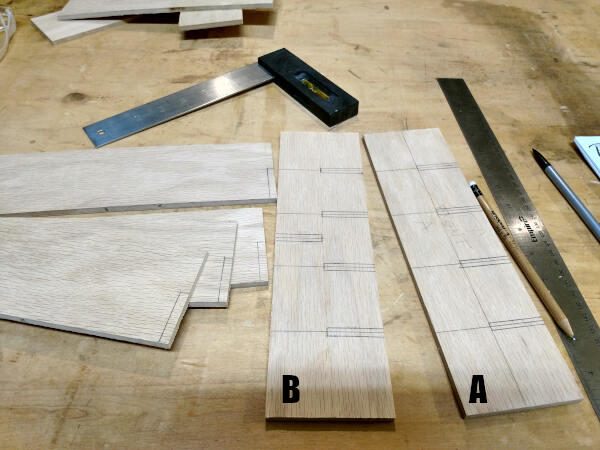
You’ll also need a center notch on B, from the opposite edge of the other notches. This will be for the piece marked as X.
Mark up piece C also with a center notch, and notches at each end. Then finally notch one end of the D pieces.
Now you can cut out your notches with a scroll saw, band saw, jig saw, or coping saw:
My picture above jumps ahead a bit, as I already had piece X figured out and cut.
To get to that point, you’ll cut the other pieces, fit them in your drawer, and measure the space for X (from the back of C, to the front of B).
This piece needs to fit tight. That way there’s no slop or wiggle room from front to back.
Once piece X is cut, notch it out and make sure everything fits together tight.
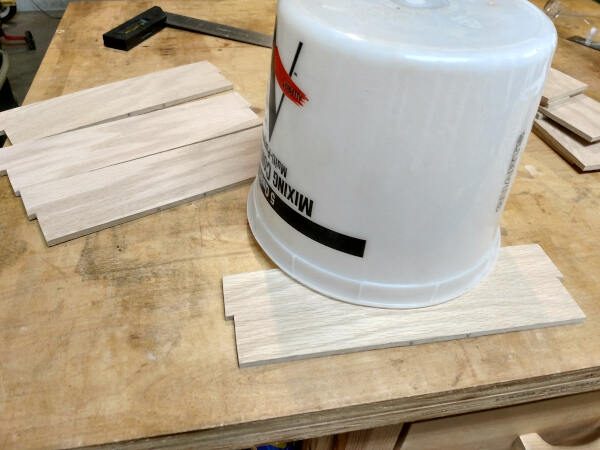
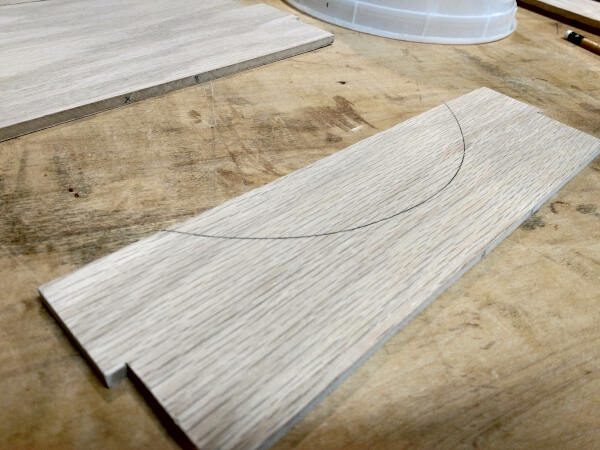
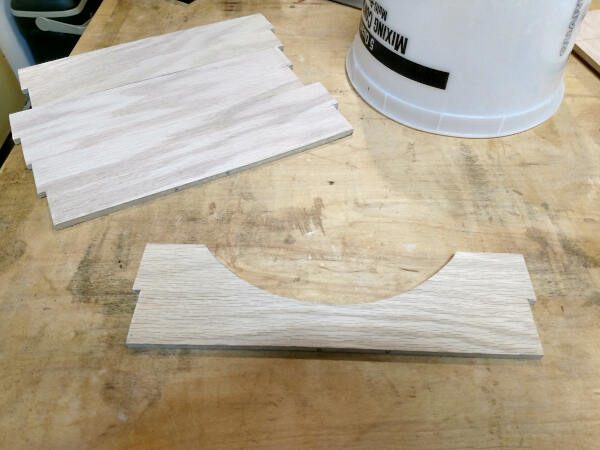
Now you’ll want to cut curves in the dividers. A simple way to do this is to use a bucket as a stencil, and mark curves on each divider piece. Cut the curves with a curve-cutting tool (scroll saw, band saw, jig saw):
Note: if you haven’t decided yet on a curve-cutting tool for your work shop, check out Scroll Saw vs Band Saw – Which Should You Start With.
Now you can sand all the corners and edges. Round over the tops of all the pieces a bit so they’re soft to the touch.
Fit them into the drawer.

Everything should fit together nice and tight if done right.
If you do have any pieces that are shifting, you can sturdy it up with a bead of hot glue at a couple of the joints.
This is how to build a silverware drawer organizer!
Up Next
How To Build A Simple Picture Frame
How To Build A Miter Sled For Your Table Saw