How To Square Up A Board When You Only Have A Table Saw
When you don’t have a fully equipped wood shop, but you’ve got grandpas old table saw buried under some boxes, you just might have everything you need to take on a few woodworking projects.
But you may need to learn how to square up a board first. Sometimes the boards we get don’t quite have usable edges. And that’s where this squaring process comes into play.
Luckily, you can accomplish this (in most cases) using just your table saw. And that’s what today’s post is all about.

1 – Start With A Flat Board
You may be thinking, “Well what’s the point of this article if my board is already flat?” Well, a board can be flat, and still be unsquare with rough or crooked edges.
And the table saw is designed to safely cut a flat board that doesn’t rock from side to side or corner to corner.
Click here to read more about table saw safety.
Flattening a board would normally be done with a jointer and thickness planer.
But if you don’t have those tools, you’ll want to buy lumber that’s already flat.
Most lumber yards will have pre-planed boards for sale, but that doesn’t always mean it’s flat when you go to pick it out.
Over time, the boards at the lumber yard will lose or gain moisture content, and this can cause the board to warp and twist.
Soft dimensional boards like SPF or regular pine lumber will typically warp much worse. Hardwoods are dried more and retain their flatness better.
So be sure to inspect each board before you buy it, and only get the flattest ones you can find.
Often times, you’ll find a flat board that still has a rough or crooked edge, and that’s when you’ll want to follow this squaring up process.
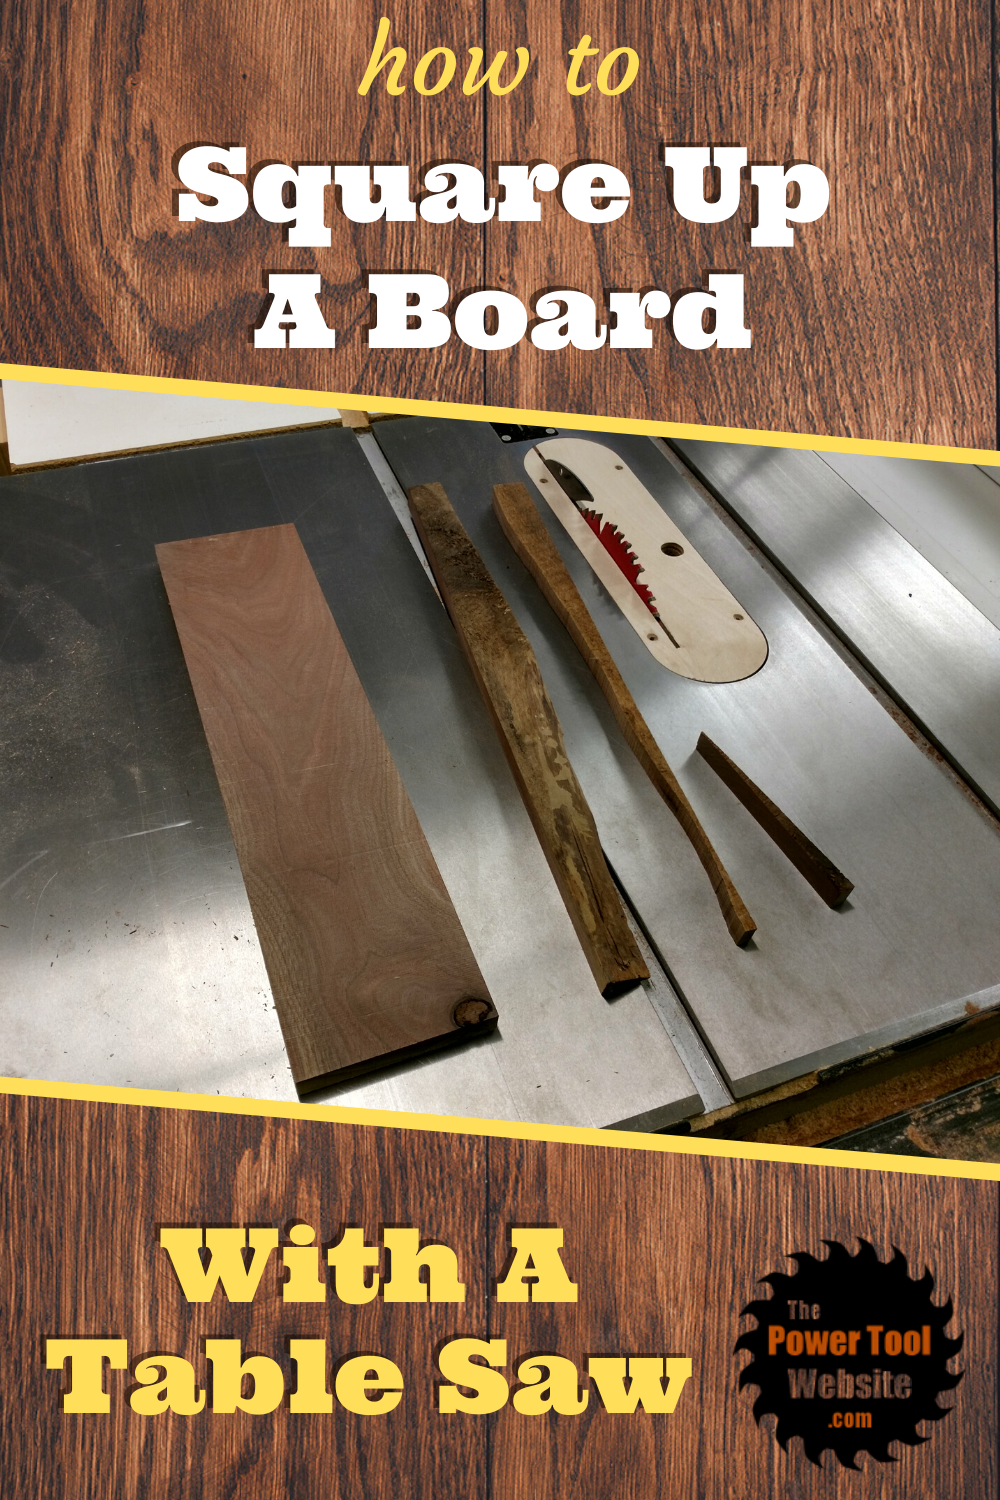
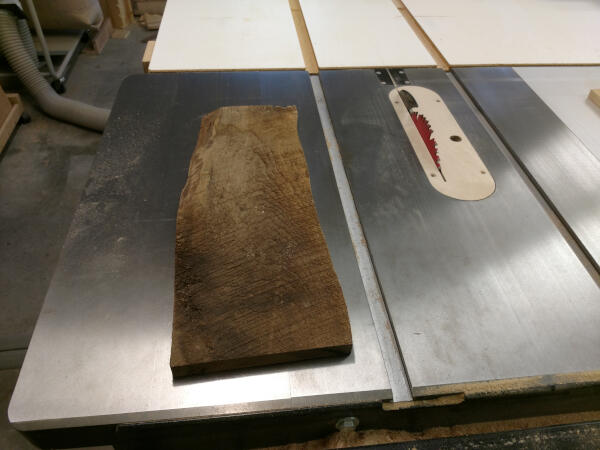
What I’ll be using today is this piece of walnut. One face is flattened, the other side is still rough.
But not a single edge is usable. One edge is live, one edge is curvy, and both ends are unsquare.
2 – Flatten and Square Up One Edge
The first step in squaring up a board with your table saw is to flatten one edge. And while this is typically handled with a jointer, we’re going to be doing things a bit differently.
Note: some hardwood boards will come already jointed flat and square on one edge. These (unless they’ve gone crooked) are typically good enough and you can skip this step.
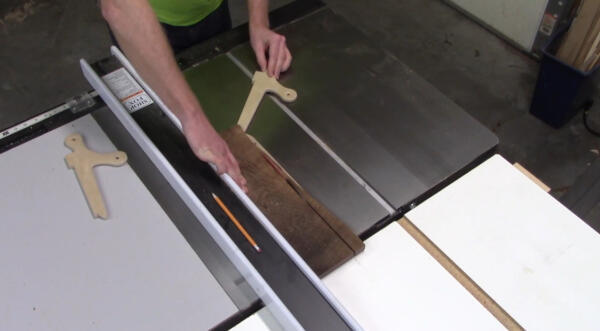
But if the board is not quite straight, or has a rough-cut or live edge like mine, you’ll want to use a special sled for your table saw.
Specifically, you’ll need what’s called a jointer sled. The one I’m using also works for larger panels, and it includes an adjustable fence for cutting repeated tapers.
Go here to see how this works, and how to get plans for this sled.
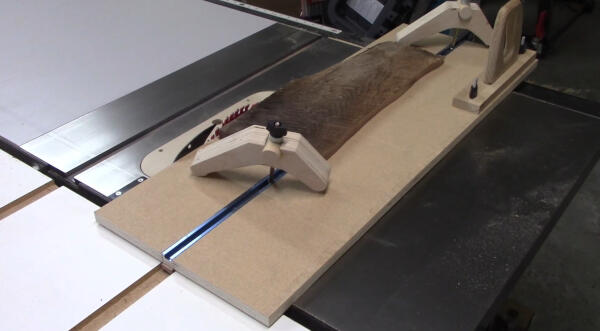
This is a sled that clamps the board down solid and tight, and runs along your miter slot to put a straight and square cut on one edge.
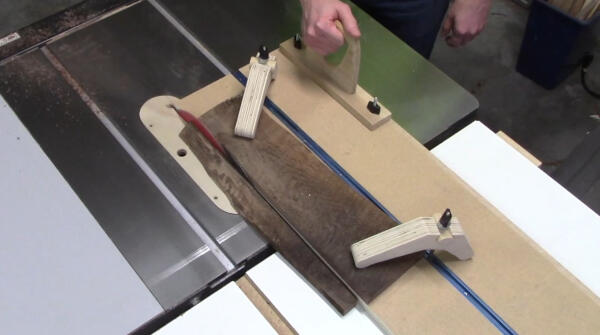
As you can see, I’ve safely removed the live edge from this board, leaving an edge that’s as straight as my miter slot.
This new flat edge can be used to reference your remaining cuts.
Now, the order in which you do the following steps is not always critical. As long as you have the one flat edge, you can’t really go wrong. I’m going to move on to the ends first.
3 – Square Up One End
You’ll need to make a perfect 90 degree cut on one edge.
This can be done using your miter gauge, but you’ll first want to make sure the miter gauge is calibrated for an accurate 90 degrees first.
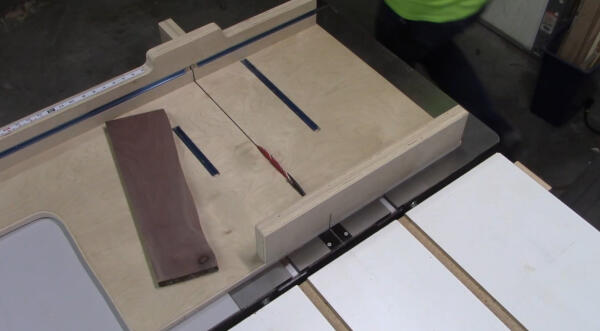
The better option for a 90 degree cross cut is to use a dedicated cross-cutting sled. This particular sled is perfect for squaring up boards, but also has many other uses.
To see a demonstration of what you can do with this sled, check out this short video here.
This is a shop-made sled that runs along your miter slot, and has a fence that is attached to the sled at exactly 90 degrees to the blade.
This means any board you hold against the fence of the sled will get cut at a right angle, without any adjustments or fine-tuning required.
Plus, it adds the benefit of being zero-clearance, leaving you with a cleaner cut in the end.
Just make sure you’re holding your flat edge against the fence.
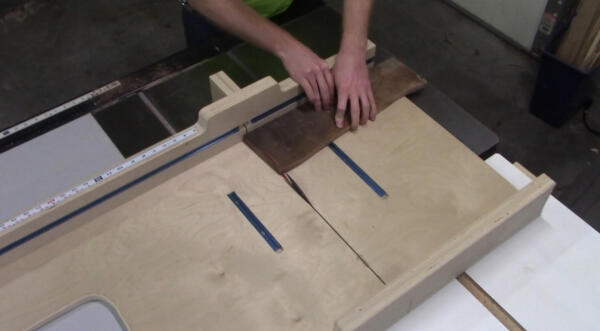
4 – Cut The Other End To Its Final Length
At this point you can square up the other end, flatten the other edge, or crosscut to your final desired length.
But for this example, I’m just going to simply square up the other end, since I don’t have a project for this board yet. I basically just want a squared board that is ready for use on my shelf.
So to square up the other end, repeat the process of holding the flat edge against the sled’s fence, and cutting the other side square.
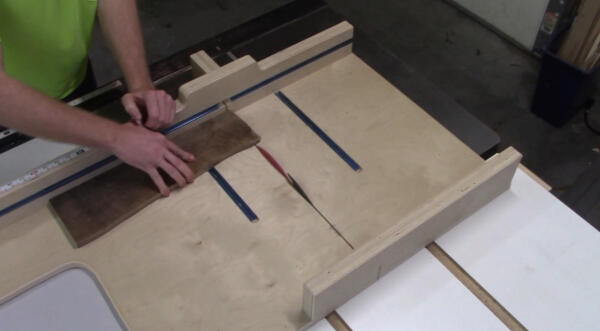
If you have multiple boards to cut at a specific length, you’ll want to put one clean end (the previous step) on each board.
Then set up a stop block with your sled on which you’ll reference each board for it’s final cross cut.
This way each board ends up with 2 clean, square ends, all cut to an identical length.
5 – Rip-Cut The Other Edge
Now make a rip cut to the final width for the board.
This should be done using your saw’s rip fence. Make sure you’re running the flattened edge against the fence.
This cut will make the opposite edge perfectly parallel to the jointed edge, which is required for a square board.
And here’s my squared-up board ready for a project:
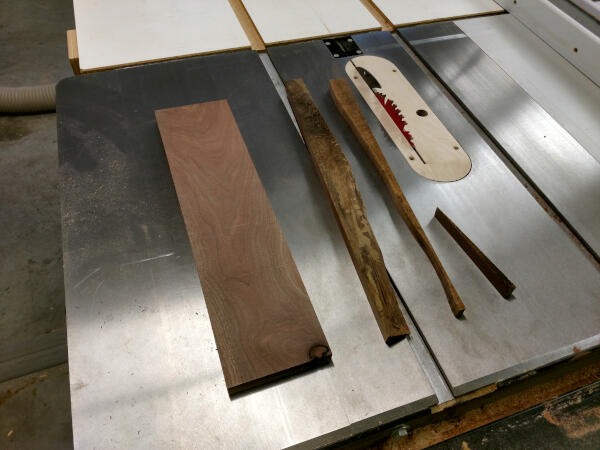
You may be thinking that the face looked rough before and now is smooth. Remember, this board had one flat face, and one rough face. In all my cuts, I held the flat face downward.
You’ll want to do the same if you have a face that’s not flat.
My next step for this board can either be resawing veneers on the band saw, or flattening the rough face with a thickness planer.
If you happen to have a jointer and/or a thickness planer, you’ll want to check out my more detailed post on squaring up rough cut lumber here.
Be sure to sign up below to get updates on new blog posts like this one, and you’ll get some free plans and templates.